

Today I wanted to show you these adorable little sets of gift cards I have made. (click on pic to enlarge) . The original idea for the cards came from a U.K. demonstrator, Helen Griffin in this post - - love her work - check her out, she does amazing things! I thought they needed a little box to put them in, so I worked out the measurements for the boxes which have reinforced sides so are quite sturdy, and they also fit envelopes I made with the Envelope Punch Board. I have put 4 in each box, but you could fit more in if you dont use dimensionals on the card circles. They look even better in real life and would make a really nice small gift for someone special.
Of course these are Christmas ones, but you could change the greeting to suit any occasion. And even better, the Decorative masks I have used are on sale in our End of Year Clearout, but get in quick - the sale ends 3rd January 2017 or when stocks run out!! The sentiments come from a wonderful set - Tin of Tags - 16 photopolymer stamps in the set and not all of them Christmas - a set I am getting a lot of use from. For any of the supplies I have used today you can order thru my online store, or contact me and I will be happy to place an order for you.
In case you are interested in making these yourself, here is how I made them... (As this is my first tutorial, please contact me if you are unclear on anything!)
Cards - Cut a piece of cardstock 3" x 6" ( I used Elegant Eggplant, Real Red, Garden Green and Smokey Slate). Score at 3". The Whisper White card on the front measures 2 3/4" square - you can use the masks on a large piece of WW and then cut to size or stamp on the smaller size. Using Versamark, press the pad enthusiastically all over the mask/Whisper White and then emboss with Silver Embossing Powder. Tip - use washi tape to hold down the mask.
Stamp your sentiment on WW cardstock, again with the Versamark ink and emboss. Punch out using the 1 3/4" punch and then use the 2" punch with the Silver Glimmer Paper. Layer the circles and attach the greeting to the card using dimensionals.
Envelopes - Use the measurements for a 3 x 3" card on the Envelope Punch Board.
Box -
Lid - Start with a piece of card 5 3/8"square. Score at 1/2" and 1" on all 4 sides. Using scissors, cut up to the second scoreline on both the small squares. Remove the two squares on the end and the bottom square next to them. Take a small "sliver" off the remaining square. Do the same on all 4 sides and angle the ends of the long rectangle. Hopefully these photos will show you what you should be left with.

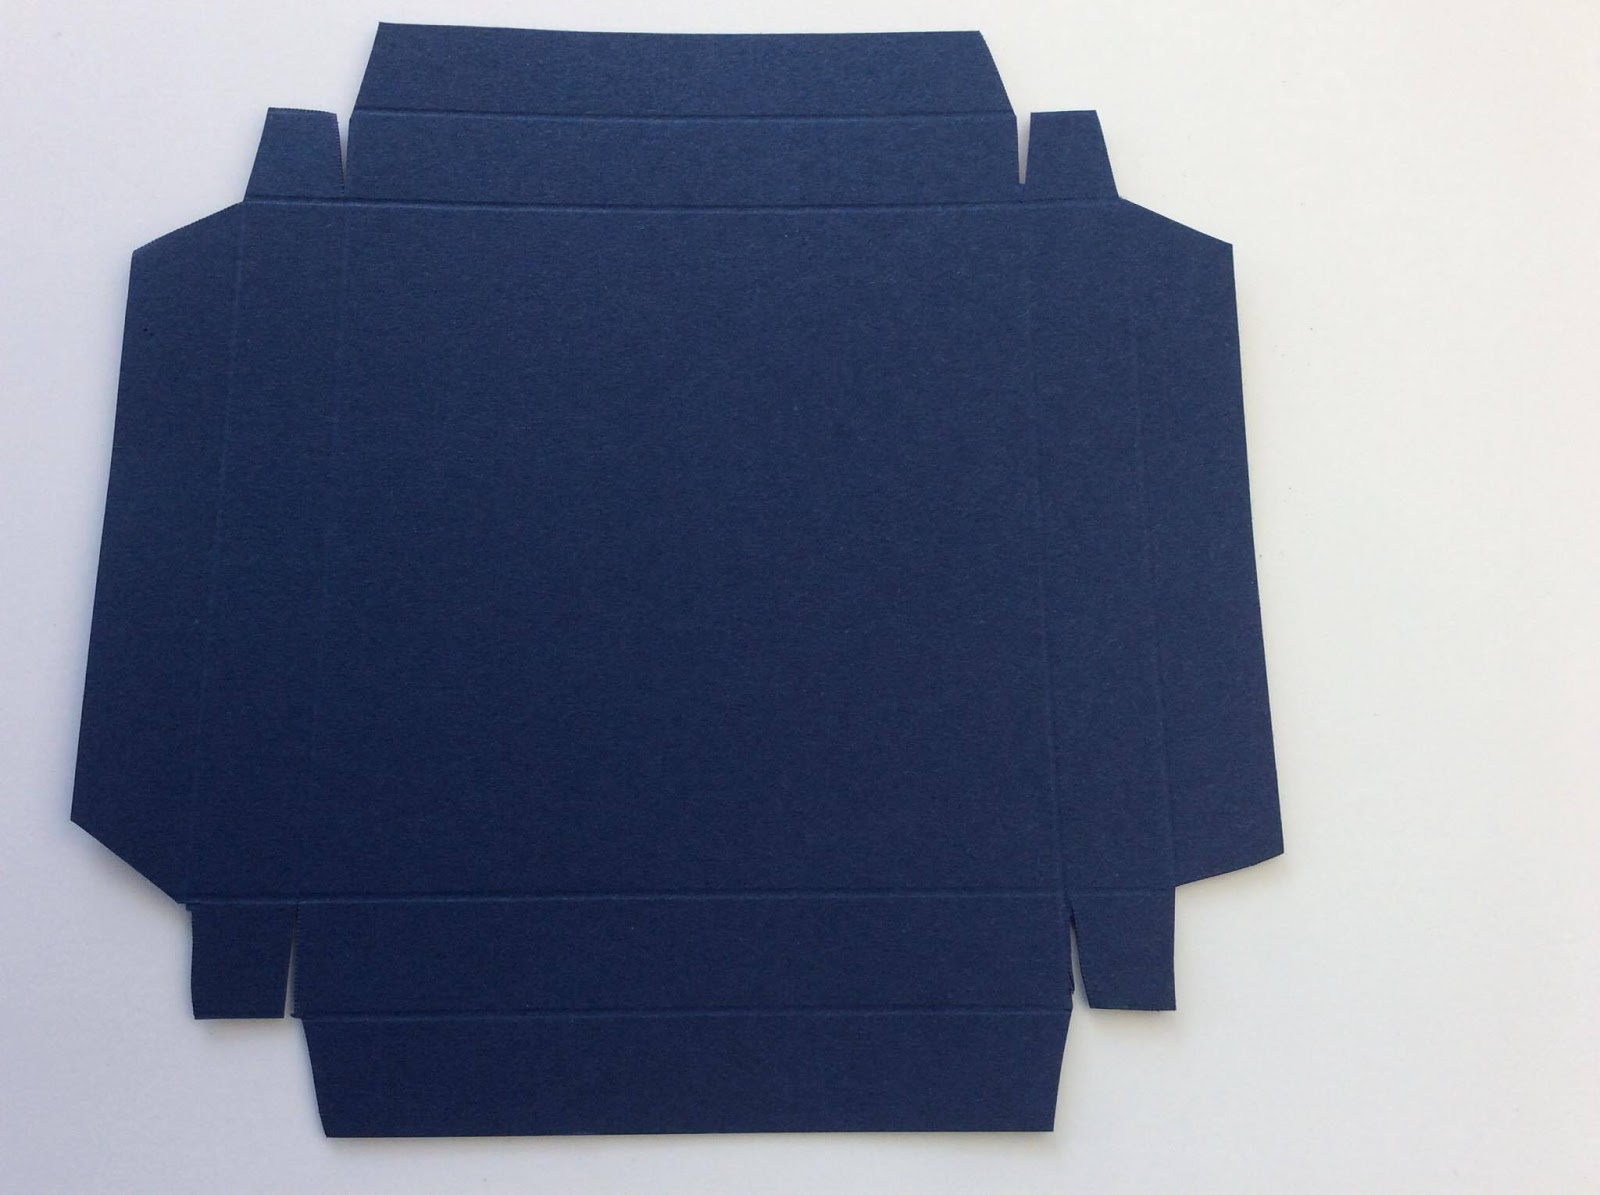
Fold and burnish on all score lines. Place strong adhesive, such as our Fast Fuse - liquid glue is fine too, - along the angled rectangle and fold in on the first score line. Then using the glue/tape again on the notched out squares, attach to the rectangle sides, on the inside, to make the box.
Stamp and emboss the sentiment and layer the same way as the cards and attach to the lid of the box with dimensionals.
Base - Start with square card measuring 6 3/8" less 1/16" - this will ensure a snug fit. Score at 3/4" and 1 1/2". Complete in the same way as the lid.
When you or your recipient have used the cards, the box can be reused - a perfect size for jewellery or small chocolates!
I hope you have enjoyed my first tutorial and if you make these, I would love to see what you create!